
DQVerify Platform Walkthrough
A step-by-step guide to exploring the Global Demo, validating contacts in real time, and running your first batch job.
Before you begin — create your free account
You'll need a DQVerify account to follow this walkthrough. Sign up in seconds — no credit card, no SFTP, no sales call. Your free account comes with 100 validations across address, email, and phone, so you can run through every step below on real data.
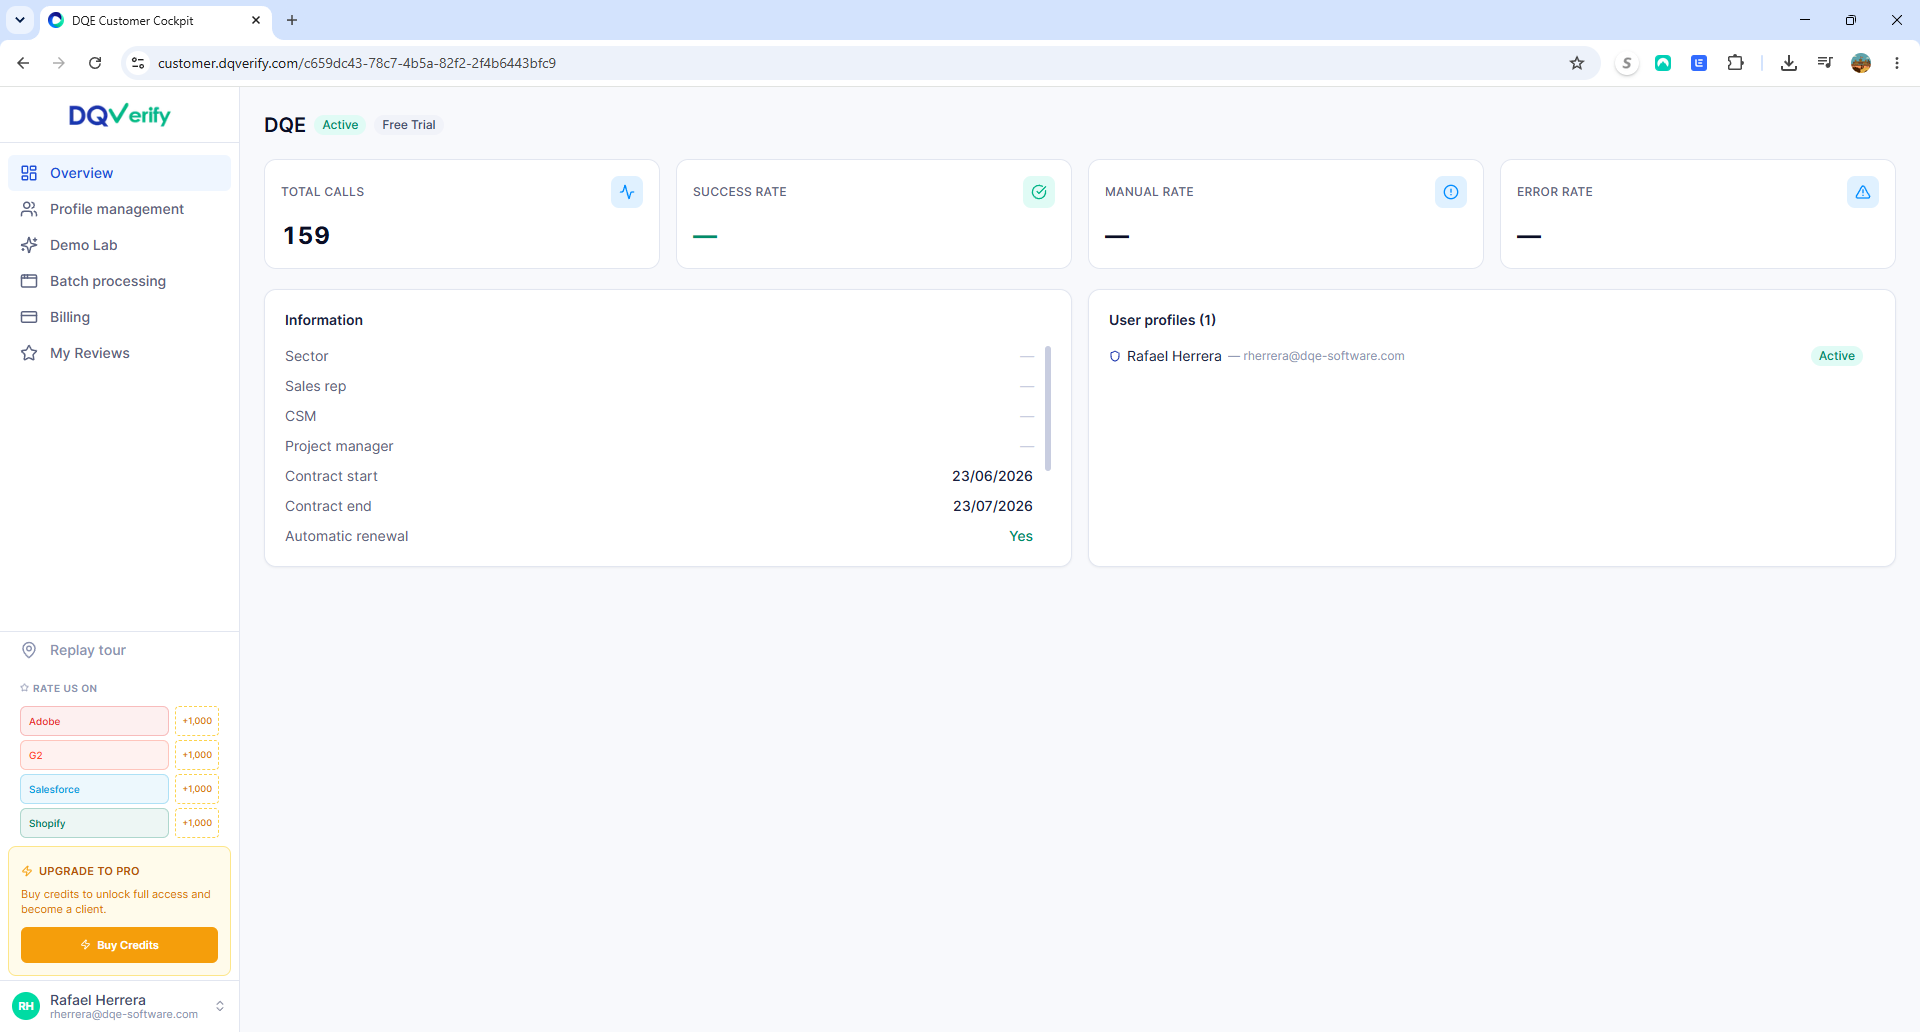
- 1Go to dqverify.com and click Start free in the top navigation.
- 2Sign in with Google or Microsoft — or enter your work email and click Continue.
- 3If using email, check your inbox for the confirmation link, then complete your profile.
- 4You'll land in your DQVerify cockpit — the starting point for this walkthrough.
Your free account includes
- 100 validations — address, email, or phone
- Results in minutes, not hours
- Full API access — REST API + CSV upload
- No credit card required
Business email required. Free accounts are limited to 100 validations per organization. Already have an account? Sign in here.
This walkthrough covers the DQVerify cockpit — the browser-based platform available after signing in. It does not apply to direct API usage.
Open the Demo Lab
From the left-hand navigation menu, click Demo Lab. This opens the Interactive Demos page, where Global Demo is selected by default.
Global Demo combines every DQE validation tool — phone, email, address, and company lookups — into one form. It's the easiest place to start exploring the platform.
Validate a Phone Number and Email Address
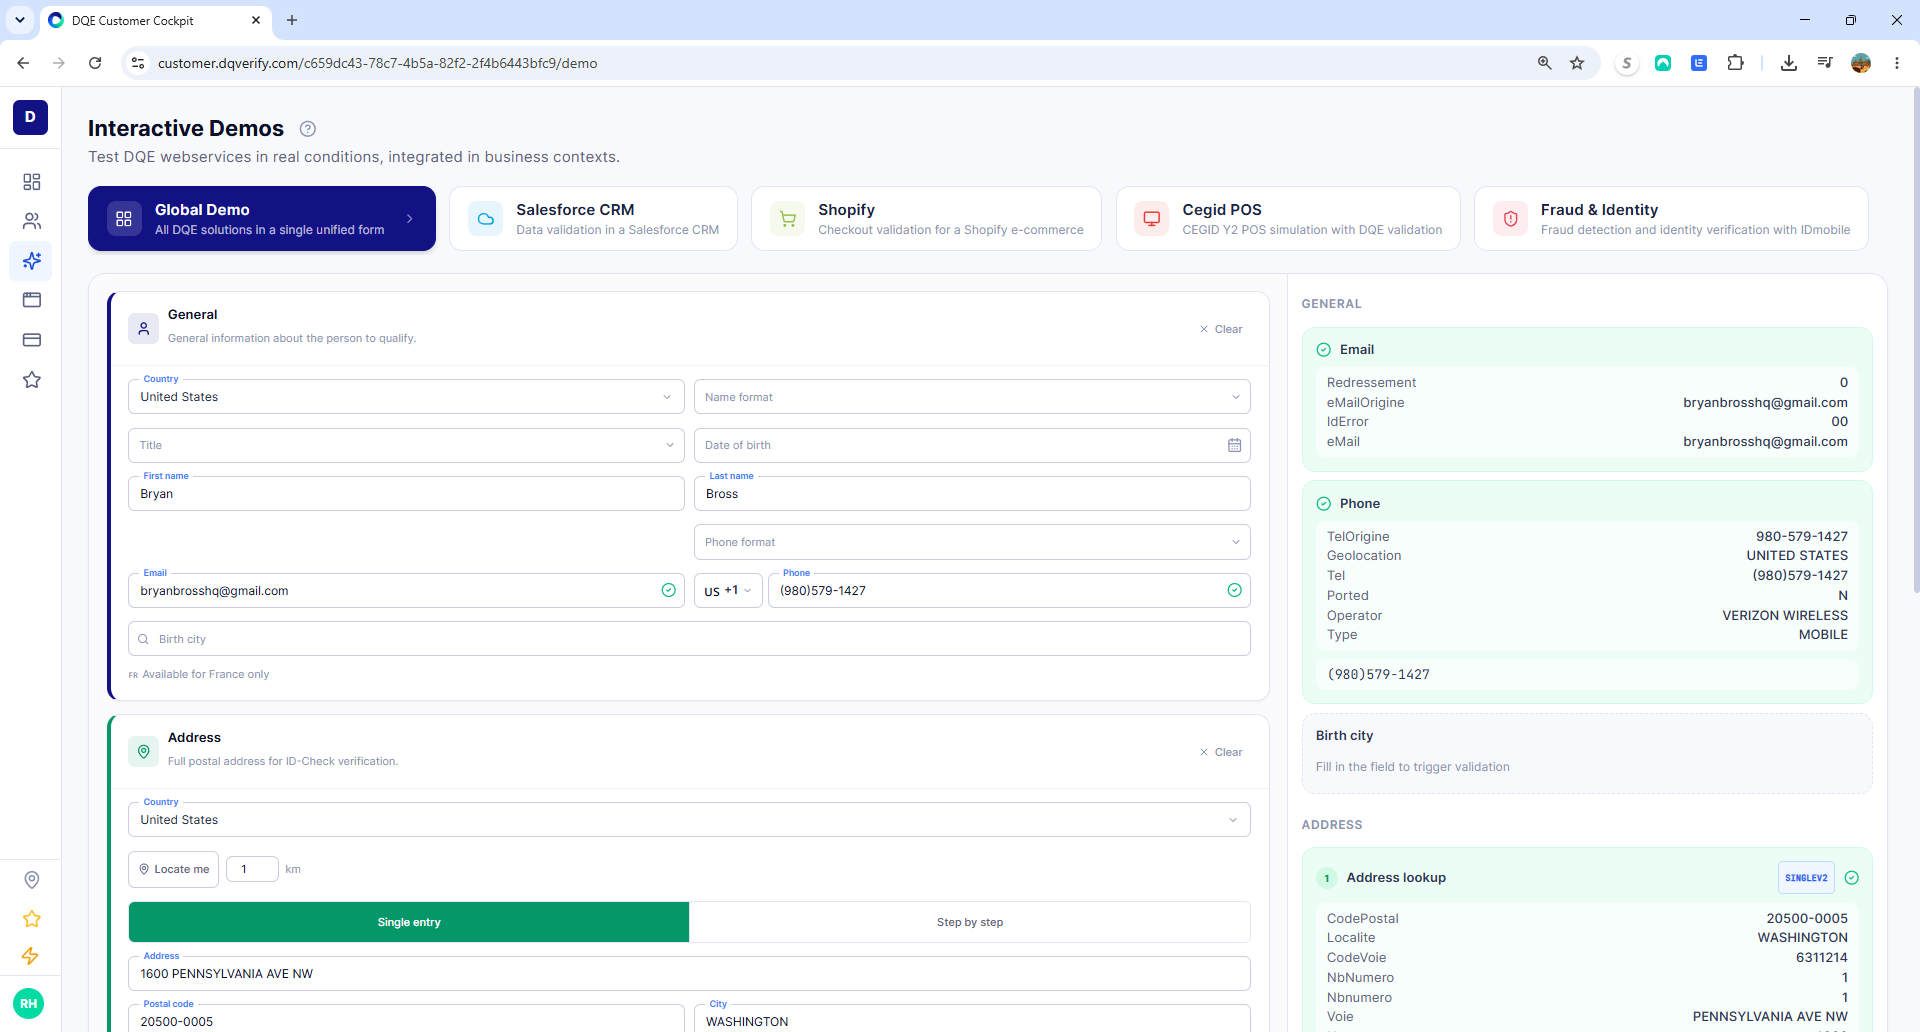
Under the General section, enter an email address and a phone number (select the country code first, e.g. US +1). DQVerify validates each field automatically as you finish typing.
- Validity confirmation
- Internal status code (00 = no issue)
Phone
- Geolocation
- Carrier name
- Line type (mobile / landline)
- Ported status
Validate a Street Address
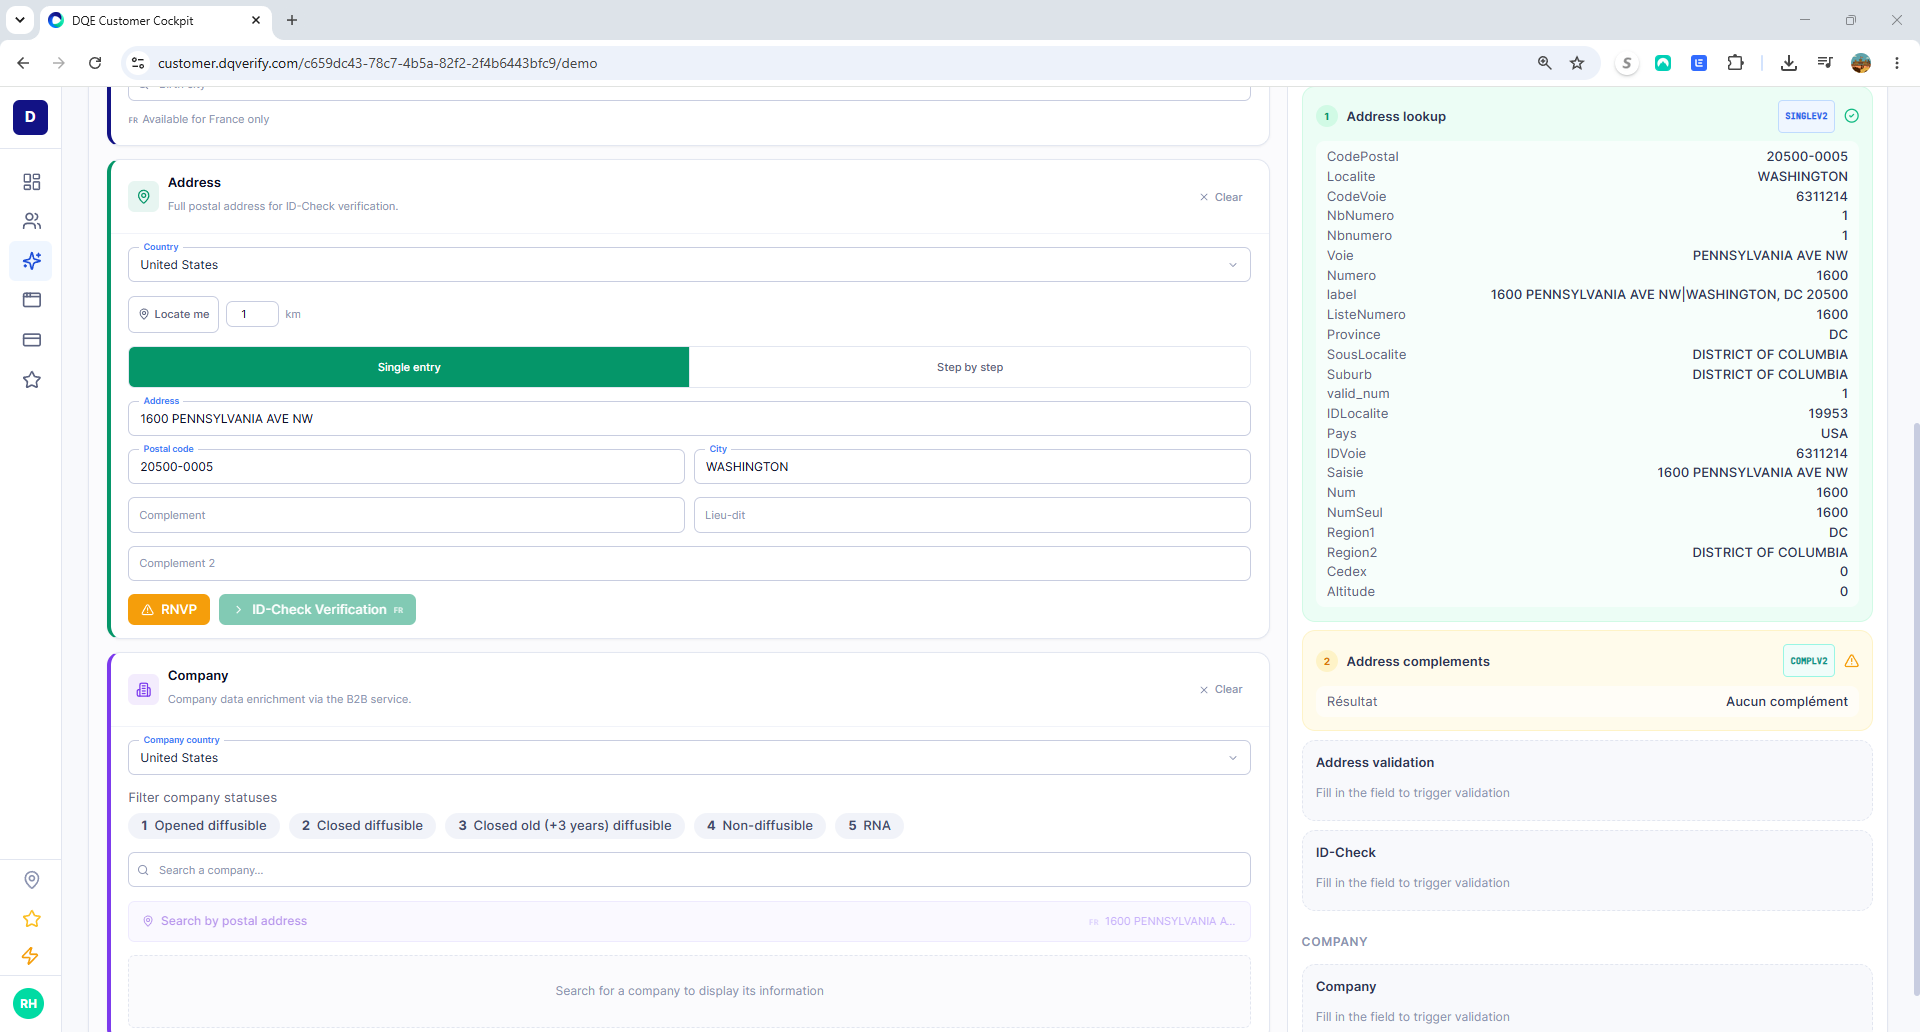
In the Address section, start typing a street address. A dropdown of matching postal addresses appears as you type.
You must click a suggestion from the dropdown to trigger validation. Typing the full address without selecting a suggestion leaves the results panel blank.
Once selected, DQVerify auto-fills the postal code and city, and the results panel returns standardized address components, geolocation info, and region codes.
Start a Batch Job
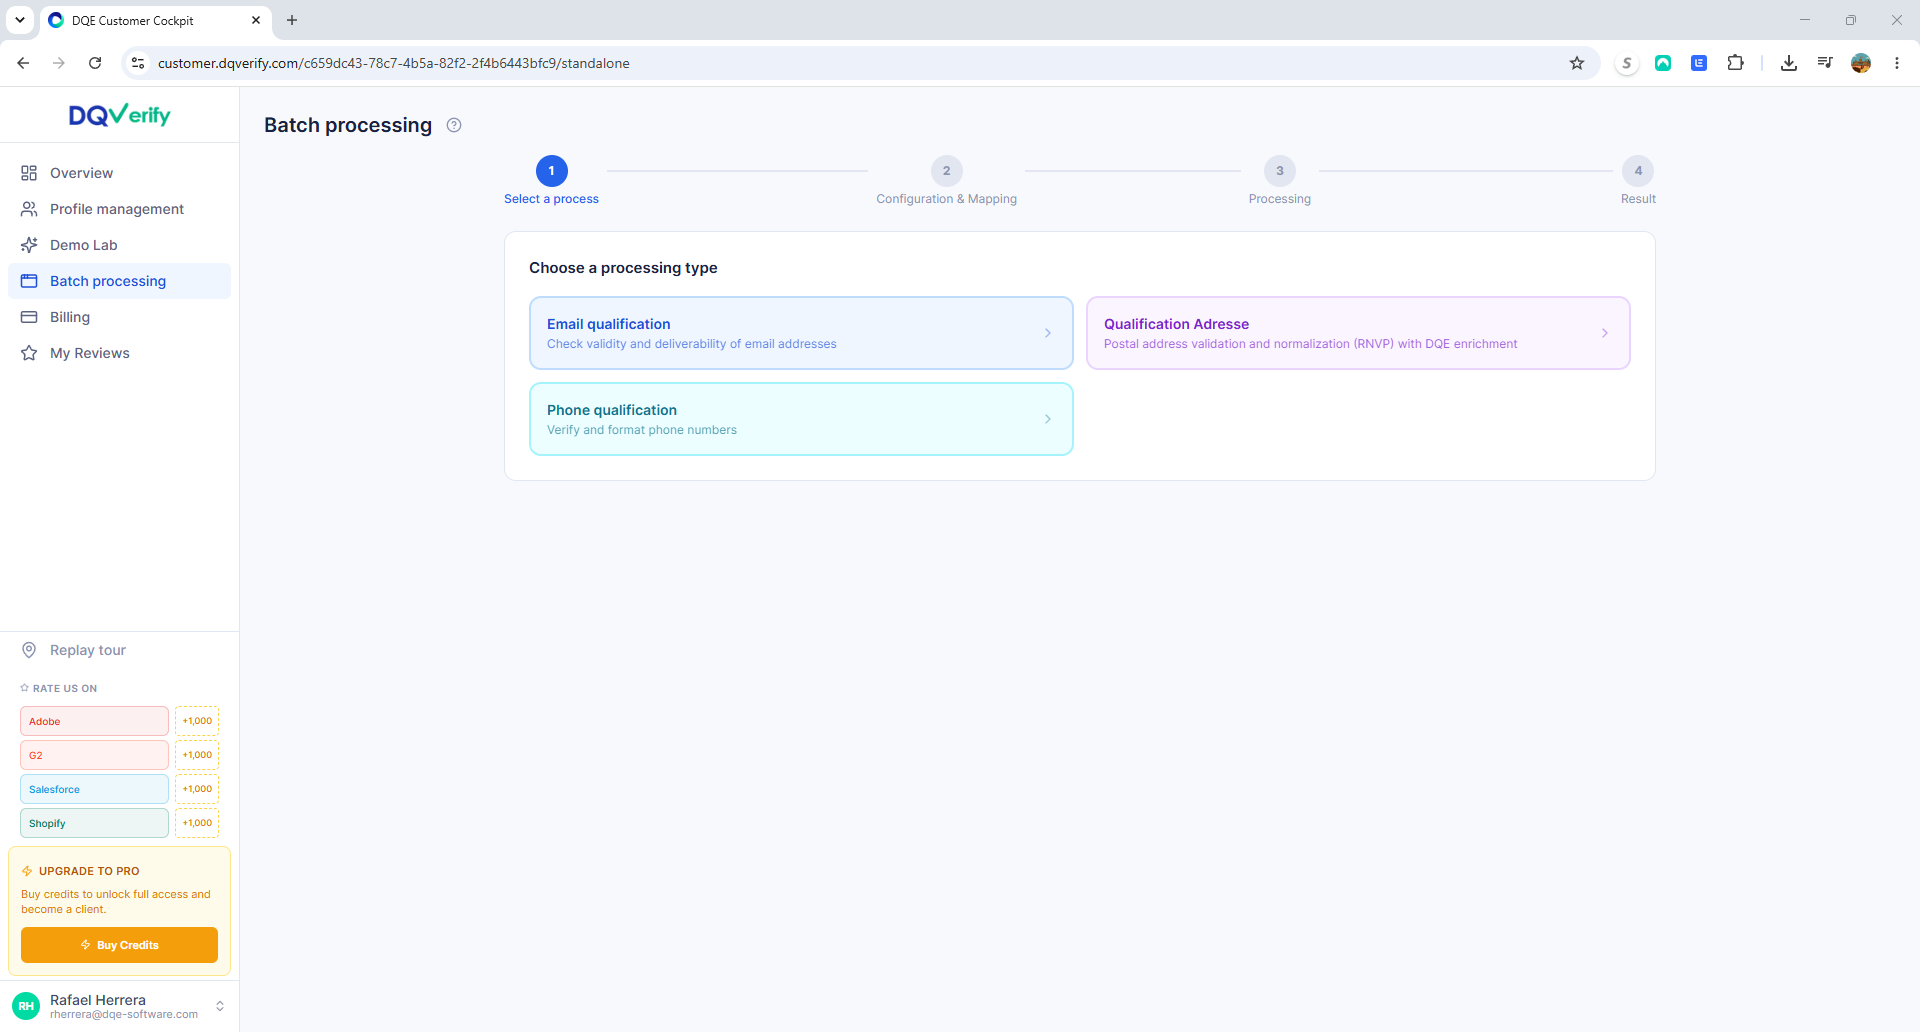
From the left sidebar, click Batch processing, then select a processing type. For this walkthrough, choose Email qualification.
Batch processing runs through a four-step wizard: Select a process → Configuration & Mapping → Processing → Result.
Configure, Map Columns, and Run
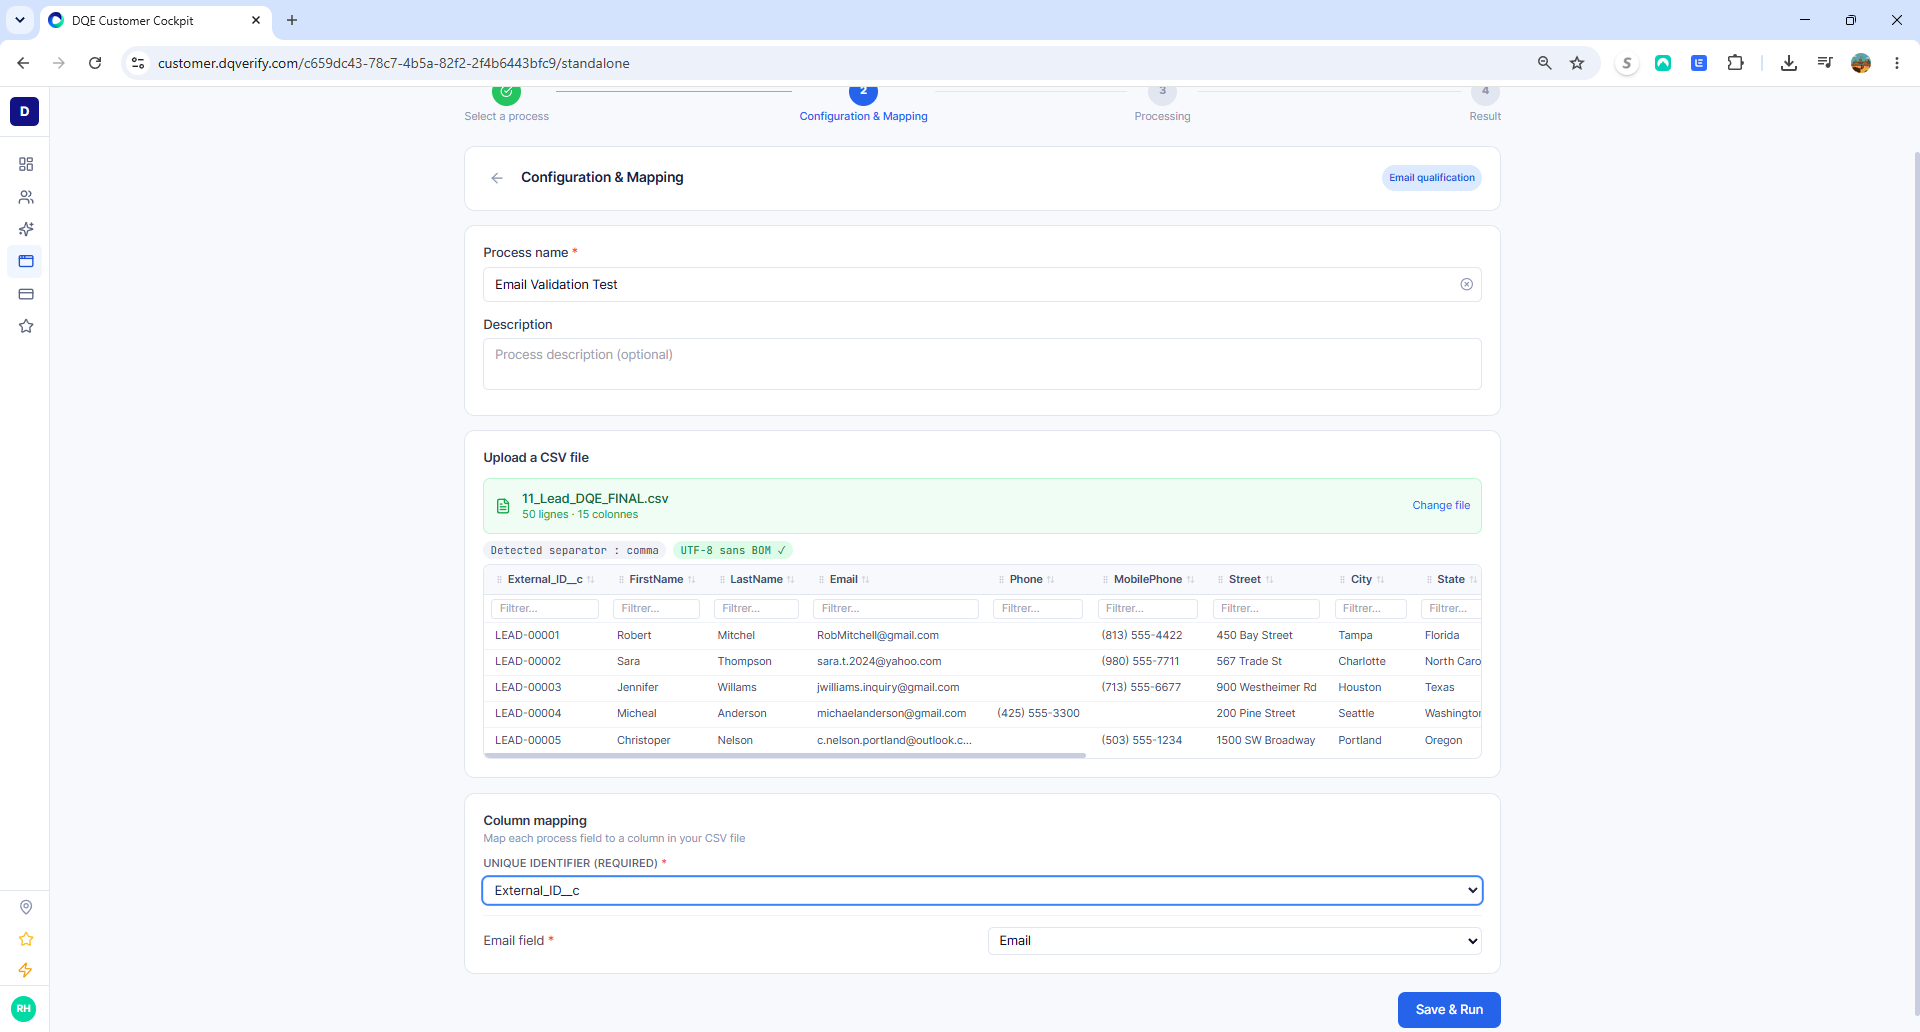
On the Configuration & Mapping screen:
- 1Enter a Process name (required).
- 2Upload your CSV by dragging it into the upload box or clicking to browse. DQVerify shows a preview with detected columns, encoding, and delimiter.
- 3In the Column mapping section, select your Unique Identifier column (required) and the column containing email addresses.
- 4Click Save & Run to start processing.
Review Results and Generate a PDF Report
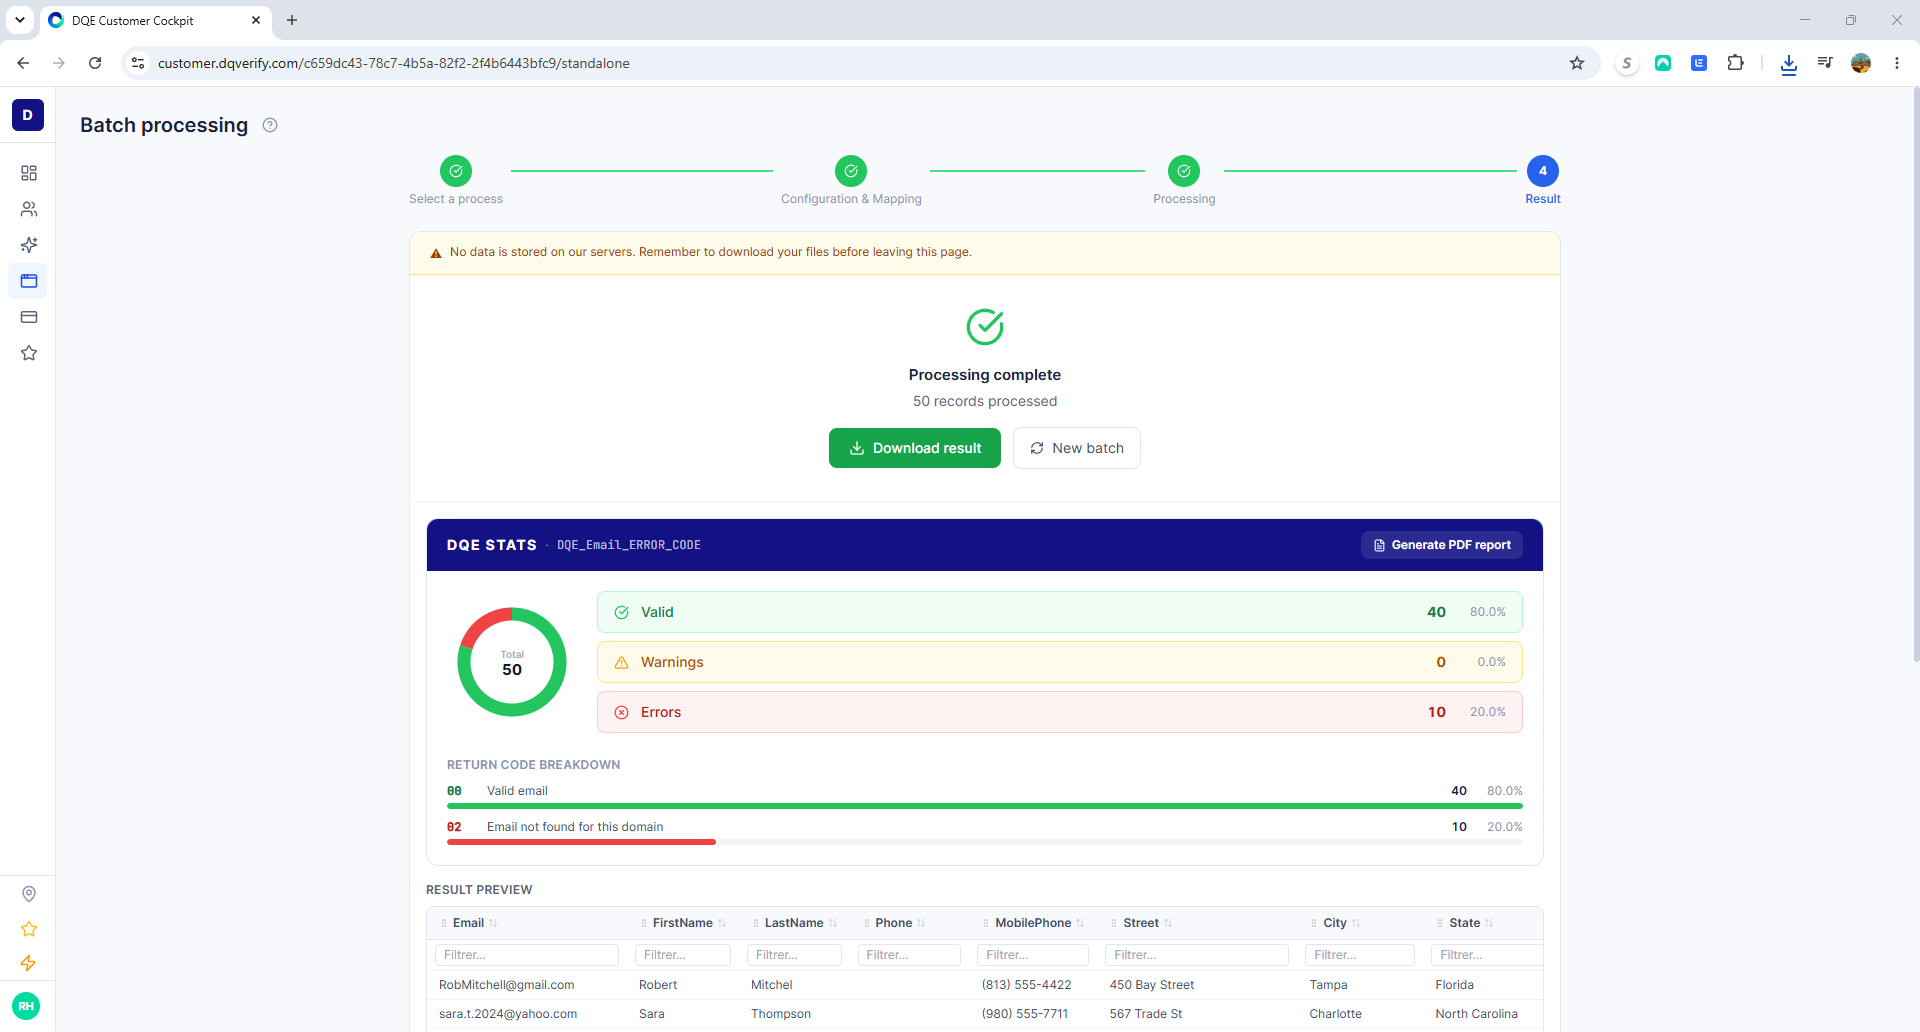
Once processing completes, the wizard advances to the Result step.
Download result
- Enriched CSV with all DQE columns appended
DQE Stats panel
- Valid / Warning / Error counts with percentages
- Return code breakdown table with specific failure reasons
- Scrollable result preview
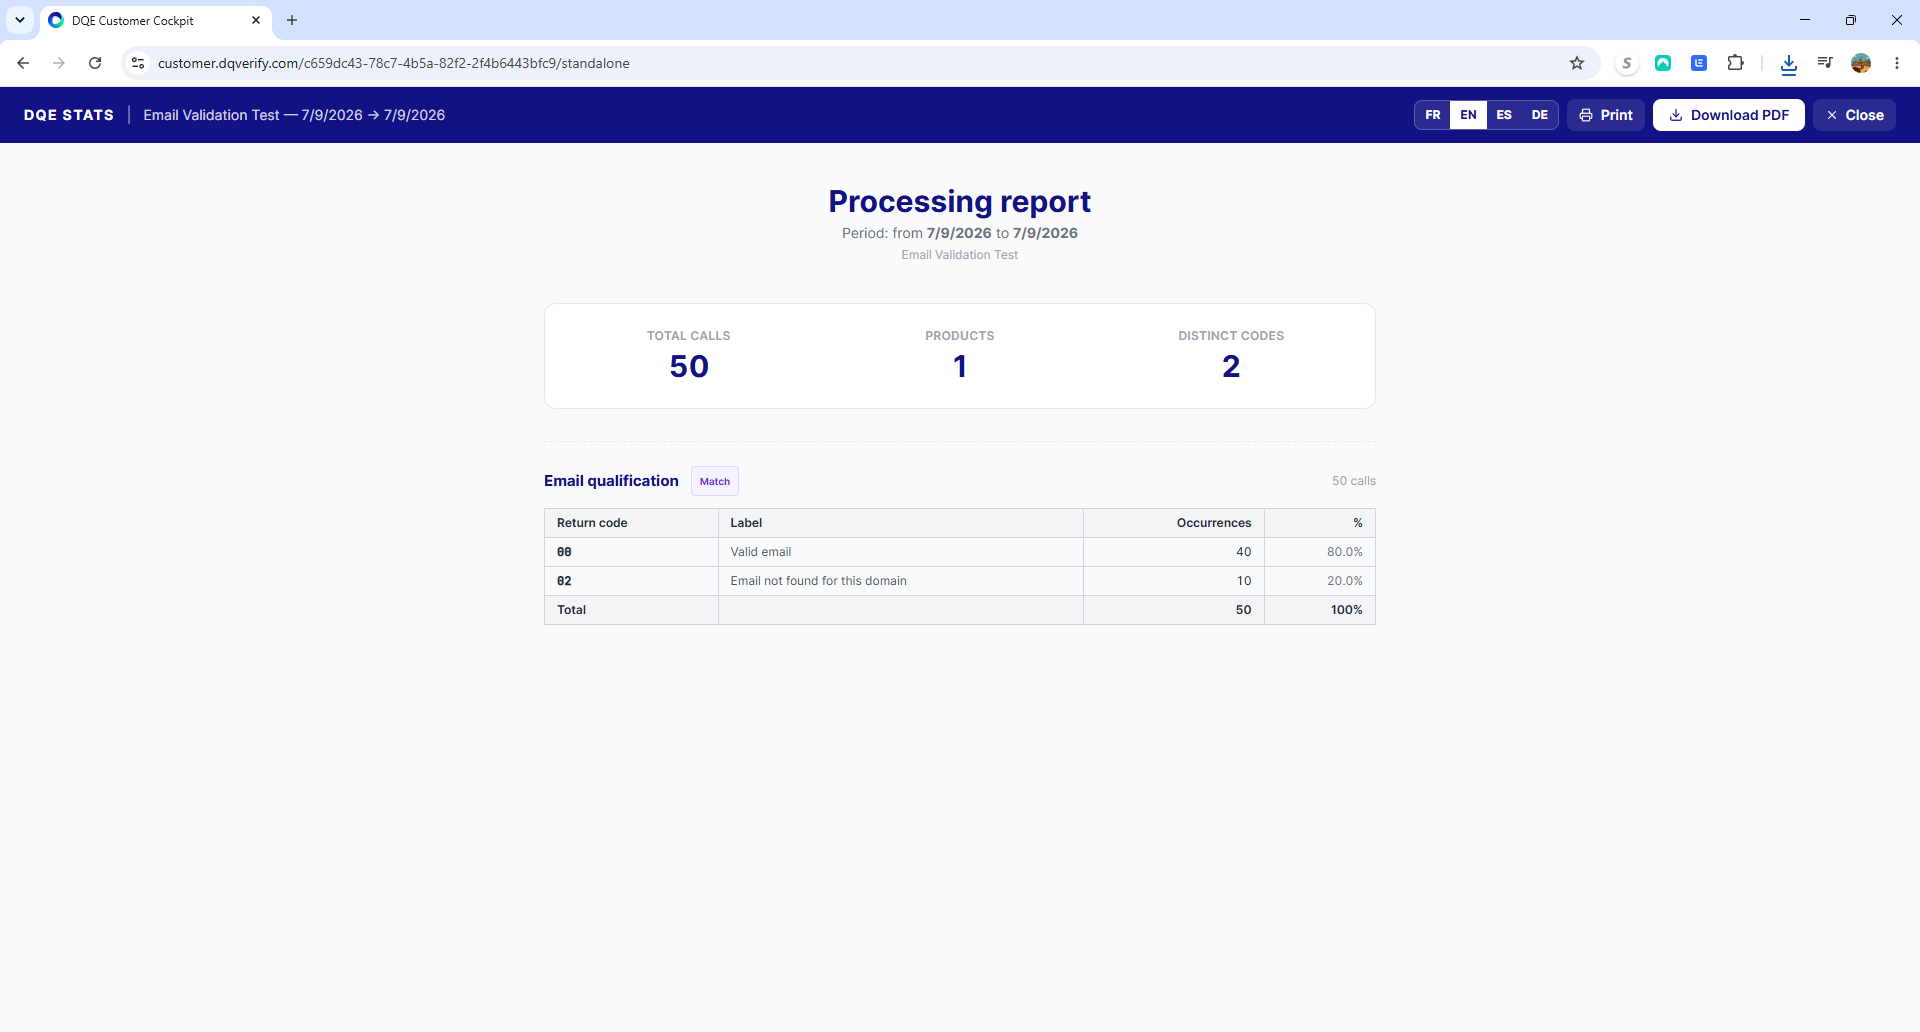
PDF report
- Click Generate PDF report to open the report viewer
- Switch between EN, FR, ES, DE with the language toggle
- Download or print the summary
DQVerify does not store your data on its servers. Download your enriched CSV and PDF report before leaving the page — results are only available for the current session.
You've seen the full DQVerify workflow — from real-time single-entry validation in the Global Demo to uploading a CSV file, mapping columns, and reviewing enriched results with a PDF report. Ready to process your own data? Sign in to your cockpit and head to Batch processing.
Next steps
File-Based Batch Processing
Deep-dive into batch processing — file format requirements, column structure, and output.
Understand DQE Output Columns
Every column DQVerify appends to your processed file, explained.
API Response Codes Reference
Complete reference for all HTTP and service-level response codes.